W/E 25th May 2020

DSCF8605a

So we end this week with the project not looking that much different to before however this week has really been all about the suspension.

DSCF8595a

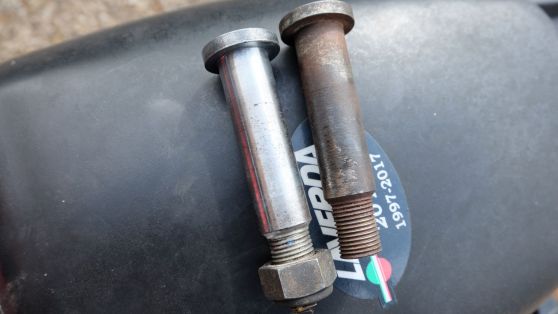
Having fed penetrating oil into the seized swinging arm bolt for the past week the bike was put upright and I hoped for some movement. Nothing. So the challenge was to get the bolt out but without damaging the threads on its end. Time to reflect is always useful and I wondered if the bolt thread was the same as on the front wheel spindle of a Jota/RGS (remember you use this to pop the alternator off its taper)? I was in luck so it was out with the trusty Honda VT500 wheel spindle and I threaded this so half the nut was on the frame bolt and half on the spindle thus ensuring no thread damage. You can see it needed a little persuasion but soon it tapped out 🙂
DSCF8597a

After and before (should’ve put them the other way round)

I cleaned up the bolt, working hard to get a good surface for the bearing in the swinging arm to seat on. However it began to dawn on me that the swinging arm worked in the same way as the suspension wishbone i.e. there is a bush that works on a plain metal bearing.
DSCF8602a

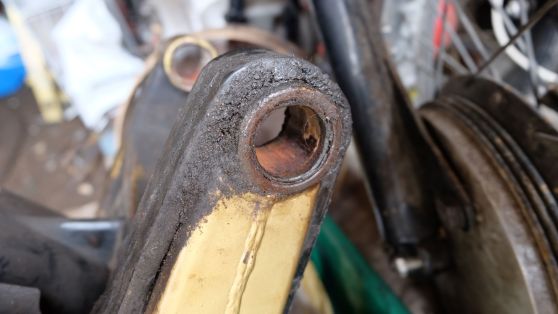
Rusted inner bush which in turn is rusted to the plain bearing

Sure enough in all the mess there is indeed a bush and bearing. What happens is that the bush seizes on the bearing which then means the bolt becomes the pivot point. If I was to buy another Atlas one thing to check is as you bounce up and down on it do the swinging arm end bolts move? If they do then the swinging arm is seized! Lucky I had spares on the shelf so next stop was to press out the old bearings.

DSCF8599a

I spent a few hours with the vice, Radio 4extra, old imperial sockets as spacers and a big hammer. I then repeated this exercise on the suspension knuckle. The tough part of this is getting the seized bush out of the plain metal bearing. Once this is done the plain bush pressed out (and in) with relative ease.

DSCF8606a

Complete suspension knuckle just needs the o ring seals

The final job was to paint the rusty swinging arm. I’m not trying to make the bikes look concours (surely not) so some Hammerite Gold was pushed in to action just to stop further deterioration.

DSCF8603a

Note chain adjustment sticker – another reason not to go for full paint job

So the suspension on the Atlas is something that requires regular maintenance – it needs to be stripped twice a year to ensure things don’t start seizing! The plain bearings are things you can buy from a bearing factor but the ‘spacer’ bushes don’t seem so easy to locate (especially the long bush in the centre hole). The other thing not to forget is the o rings as these are all that stand in the way of muck getting to the bearings. On this subject it’s worth noting that the o rings get messed up by oil (despite probably being viton) as on both bikes the swinging arm bearing on the chain side was the really seized item and in both cases the o ring between the frame and swinging arm had rotted.

DSCF8565a

Finally a a nice surprise came through the post in the form of two repaired centre stands for the RGA/S. Clem had welded in sections on all the legs where they’d whittled holes in themselves through rubbing the underside of the exhausts (funny you’d think the exhausts would come of worse hey). Clem had then moved on to the locating holes which were oval. He’d welded these up and re-drilled them and chucked in some new stainless bearings. It’s a top class bit of work and easy to underestimate how much work went in to restoring parts that are becoming expensive and difficult to find. A big thanks 🙂

Nick 🙂


W/E 19th May 2020

DSCF8564a

A lick of black paint and we’ll be ready to go!

The Atlas project is moving forward after a ‘difficult’ period 🙂

The cams were made to spin more freely because I did the unimaginable for a bloke and decided to look at a manual! There isn’t an Atlas workshop manual available on-line but there is a 500 one . The manual shows that it is only the black 9mm studs (nuts facing inside the motor) that are tightened to 28 ft Ilbs – the remaining nuts are just done up ‘tight with a hand spanner. I checked this understanding with Andy Bartlett who races 500’s and bingo free cams! All the marks were lined up and Mrs A lent a hand to connect up the cam-chains.

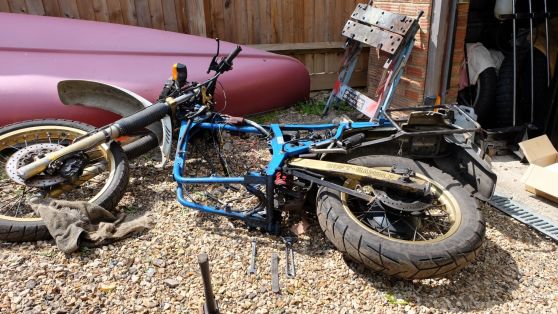
Atlas #1 and #3 are now ‘built’ but before going back in the frames need black paint (especially Atlas #1) and the frame on Atlas #3 needs the swinging arm pivot unseizing.

DSCF8551A

A new 1 ton press arrived from Germany so it was time to see if I could get the bearing inner races off the cush drive shaft (the bearings had collapsed with the inners left on the shaft and the outers in the cush housing). Of course I didn’t bolt the press to the bench and had a go pressing with my foot on the back of the unit to try and steady it. Not a chance (in truth I think the press even if fitted to a bench isn’t heavy enough) but the bearings did start to move (maybe half a mm). It was just enough to get a cold chisel into the back of the lower bearing and with a 14mm socket acting as a spacer and bit of hammering in a vice saw it all come apart!

The outer bearing has spun in the cush housing so needed packing. In the past I’ve done this with Loctite but as I’d had some shim delivered this was cut to shape. I must say I prefer the mechanical as opposed to chemical solution. I’m yet to finish the cush because the inboard bearing is a good fit so it was put in the freezer to assist with its installation and I got distracted…

DSCF8553A

And so the second task assigned to the new press ended up with a 14mm socket, vice and big hammer… The lower suspension pivot was worn (this bearing is worn on all my Atlas’s so it’s a common issue [even if you don’t know it yet]) so the old one needed ‘pressing’ out and a replacement pressed in. Once the bush had started to shift so that I could flatten it a bit extraction was straightforward. Pressing in the new bush with the 14mm socket and tightening the vice was sweet.

I checked the markings on the plain bush and was surprised to see that it is a standard bearing (PAP 2025 P10) that can be bought for £1 from a bearing factor! I shall be taking serial numbers of all these for the future – it’s good to know that I won’t have to buy genuine Laverda parts in the future.

So this week ends on a high 🙂 The vice turned out to be a waste of money in one sense however waiting for it to arrive made me slow down and think – in that sense it was £55 well spent! Similarly I got the shim in for the camshafts but it’s come in handy for the cush drive so another result.

Atlas #3 frame is having penetrating oil squirted into the seized swinging arm. I hope to have this sorted next time we ‘speak’.

Nick 🙂

W/E 12th May 2020

DSCF8534a

So time is moving on and it seems I’m no closer to getting an Atlas road ready. Kind of depressing but just have to keep pressing on I guess…

I’d hoped to have the cam-chains on Atlas #1 and #3 engines hooked up but failed. Atlas #1 with the worn cam journals went back well enough but the inlet cam on Atlas #3 refuses to spin freely. A major frustration considering it was okay when it came apart. The cams spins until the torque increases and then it locks.

DSCF8542a

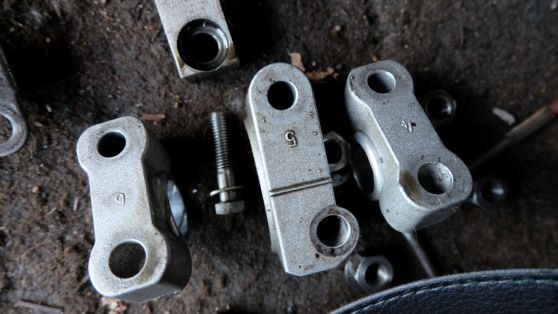
I wondered if I’d mixed up the cam-blocks but these are numbered 1 – 6 and everything checked out.

I’m waiting for some shim to arrive to see if spacing the cam blocks helps any. It’s getting desperate…

DSCF8547a

Some ‘stuff’ has arrived through the week to get things done. First off was the engine shim washer. This measured at 0.9mm but I couldn’t find that thickness. I settled for a Form B washer that should’ve been 1.25mm thick but the correct ID/OD. Well the thickness checked out but the washer has an OD of 20mm (1mm down). I’ve ground the washer down but it annoys me that you can go to all the hassle and you still get sent the wrong size – sure it will work but I didn’t plan on having to make do and mend – there’s enough of that going on.

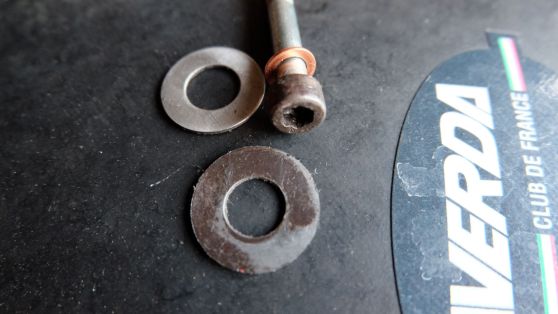
I was pleased however at the arrival of the copper washers to go under the M6 allen bolts – spot on and when eventually an engine is built it shouldn’t end up littered with seized bolts! On this topic I returned to the cam cover of Atlas #2 and using heat/quench and some citric acid managed to shift one of the four remaining bolts. However one of the bolt heads is now starting to round off the hex. Atlas #2 needs serious surgery once it’s apart so think this motor can go on the shelf for now…

DSCF8527a

Before

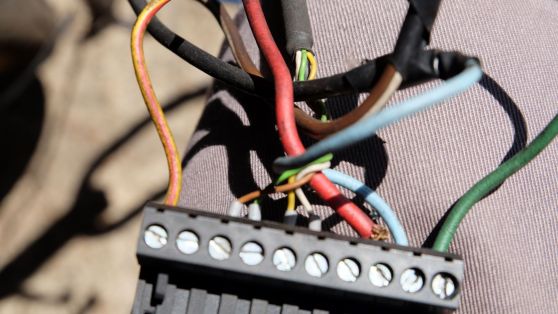
Looking for an ‘easy win’ I headed over to Atlas #3 to tidy up the wiring with my new butane soldering iron and assorted crimps. Thing was the soldering iron didn’t come cheap and wasn’t really needed other than to tin the ends of wire and one join. The wires going in to the Sasche black box were a mess of twists/tape with multiple joins and an oversize main power input.

DSCF8533a

After

It’s a good investment in whenever the bike runs again. I’ve lost count of the number of times the main power wire, being too big, had come out of the unit leading to a ‘tank off’ roadside repair.

DSCF8536a

Enthused by the wiring success I set to dismantling the seized swinging arm. Eventually I had to take the shock off and then treated the seized bolt with firstly citric acid solution and followed it up with a conventional penetrating oil. At the time I finished it hadn’t moved so next up will be an allen head socket to see if I can get it to start turning.

DSCF8541a

End of another long week

So another week gone by and still no Atlas. As I said at the start depressing but only way is forward. You get times like this when you push but can’t seem to make progress. Difficult times…

Nick


W/E 5th May 2020

DSCF8495a

So had a bit of sort through my ‘Atlas stuff’ on a sunny afternoon (yeah there’s a couple of RGS frames and some other stuff but this is an Atlas sort out). Anyways it proved useful in finding a few bits and pieces I’d bought over the years and forgotten. It also made me put things in to boxes so that when I need something I’ll be able to find it. Good job!

DSCF8494a

The big deal since I last posted is getting the final two allen bolts out of the primary case of Atlas #1 – hurrah! I’d tried penetrating oils but decided it was time to bring some heat to the party. Heated the bolts and then cooled them with water through a few cycles and inbetween gave ’em a good thump with a big hammer and an impact driver. This bolt at the foot of the cylinders proved the most stubborn but eventually it succumbed.

DSCF8492 (2)a

The first picture shows the ‘smeg’ around the bolt and here you can see how ‘crusty’ the bolt had become. I was surprised that the corrosion is on the edge of the cap and not at the base – so is it this outer ring that held the bolt so tight?

Still I’ve sourced copper crush washers to go under the bolt heads on reassembly so hopefully seized bolts is now a thing of the past!

I’ve decided that with Atlas #3 having a restored cylinder head stud that it’s best to go back to the original cams in Atlas #1 and Atlas #3 – so I’ve got to swop them round. I also decided to use the scored cams out of Atlas #1 but with the new cam bearings sent over by OCT.

The work still isn’t done because getting the cams to move freely is proving tricky. Atlas #1 has a sticky exhaust cam and #3 a sticky inlet cam. I’m not overly surprised with #1 as this was the case to start with. I suspect a slightly bent cam as it only tightens when the final end nuts are pulled down i.e. it’ll run fine if only one outer cam-block is tight. On Atlas #3 all looked good until the cams were torqued and this produced a very tight inlet cam – which is not how it was when stripped down. This is time consuming but getting the best ‘spin’ on the cams is the key to a good motor (you don’t lose power).

Watch this space…

Nick 🙂