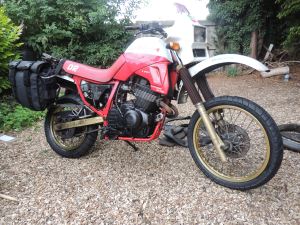
W/E 24th August

Get on you bastard!

Get on you bastard!

New boots for the Atlas this weekend. The bike shop sold ’em but couldn’t fit ’em ’til Wednesday and the tyre shop wanted £30 for the job!!! I remembered back in the day I used to fit tyres on my A65 and there was my father-in-law taking in the sun so it was out with the levers, rim guards and tyre soap. Two hours later fitted albeit with a ‘pinched’ tube laying unloved.

I had a couple of spare wheels in the shed so rather than fit the tyres to the current rims I decided to just do the job once by putting the tyres onto the spare wheels. This had the advantage of overcoming the rattling wheel bearings in the front wheel – so two problems overcome in one hit.

Fitting the tyres wasn’t so bad, the front is quite a light tyre so was easy but the rear 130/80-17 a bit of a tussle hence the pinched tube. As we got into it we got better and re-discovered that when you put a tyre on you ease it over the rim with the lipped end of the lever – that would’ve saved a pinched tyre. I never used rim guards on the BSA but they proved really useful and meant the anodised rims didn’t get scratched. All in all I was pleased to have done this and will do it in the future and perhaps if needs must at the side of the road…

Blu-tac bodge...

Blu-tac bodge…

The damned leaking alternator case persists – the rubber bung round the alternator wires has gotten brittle. Hylomar hasn’t done the job so now I’ve introduced a  ‘blu-tac’ solution! Fingers crossed hey.

Andy Strapz

Andy Strapz

The work on the Atlas is all focused on having the bike ready for the Scottish National on the 13th September. To this end I got a set of Andy Strapz panniers. The pannier frames take hard cases but I preferred the idea of soft luggage – who knows one day I might ride off road. Andy Strapz are made out of canvass with no zips (roll top) and with handy pockets fore and aft to put a water or oil bottle. They are also reputably tough so hopefully this is the last set of bags I’ll buy…Supplied (along with Rok Straps by Zen Overland who provided excellent service.

The pannier frames put the panniers a bit low and rearward and I was considering getting them welded to change their configuration. However the advantage of this set up is that the pillion has plenty of room for their legs so I’m guessing I will leave well alone – for now.

Nick 🙂

W/E 17th August

Funny kind of week which started off with a charging problem. Coming home I noticed the Atlas headlight dimmed on and off with the rhythm of the indicators. Anyway I filled up with petrol and went to ride home – click went the starter but it wouldn’t start. Lucky I was only a short distance from home and managed to bump start the bike on the final leg. Checked the charging with it running and just 10.75 volts.

Over the next couple of days I picked the brains of folk across the globe via the internet – ignored the advice and just got on and replaced the alternator and regulator (I have spares…) but still no charge? Walk round the bike and find a blown fuse and there we are charging again! Damn never came across that before – a fuse stops the bike charging, not running but charging. Anyway fixed and on my way only to now have a leaking alternator cover because I’ve disturbed the rubber cable bung…There’s some learning in here about not prejudging which I will write up soon.

Found that the Atlas is now overdue its road worthiness test so set to the lights and speedo. Well for no reason I know the front brake light is now working? Ticked off the list I move onto the indicator or the rear nearside that won’t flash.

Using the multimeter I find the live feed is only giving 4.5 volts so a liberal dosing of switch cleaner and we have four indicators. The flasher unit is faulty so I have to order one from the car parts shop – it needs an old 42w unit as you get off old Lucas equipped cars. The modern motorcycle runs 23w…and costs over £15 a pop. I can wait for the £3.50 unit to arrive by mail but order two fresh Pirelli Scorpion Trails while I’m at the bike shop.

Koso digital speedo - with hi beam idiot light showing

Koso digital speedo – with hi beam idiot light showing

On to the speedo. First go I get it to light up plumbing in to the coil for a live feed but when I put it into gear everything stops – must’ve plumbed in to the neutral light. Change the wiring and it all stays on…’cept the neutral light now stays on all the time…I tape over the neutral light and move on to the speedo.

Well the speedo works but seems to be running slow. Hmmmm. Decide to ‘tell’ the unit that it is running one pick up magnet (not the two that are fitted) and bingo it works (as checked with the satnav). Get high beam idiot light working and that’ll be good enough for the test…

Nick 🙂

w/e 10th August

Spent the last week away on holiday but had the weekend to get back on it.

The Atlas needs going over because it is due its roadworthiness test (MOT). The main problem in getting it through the test is the lack of speedo. I’d removed this and the rev counter because the speedo broke the cheap mechanism on the front wheel and when the mounting bracket cracked I couldn’t be bothered to cart this dead weight around any longer.

Oddly the speedo isn’t tested but has to be present (something that the tester last year raised his eyebrows at when it appeared the bike hadn’t done any additional miles – he said it must just be the odometer at fault…). Anyways a long time back I’d got a digital Koso speedo but the lack of obvious mounting point meant it just hung on the shelf.

Funky hi-tech speedo and dash

Funky hi-tech speedo and dash

I decided what I needed to do was make a ‘dashboard’ so took a hammer to an old plastic laptop stand and fashioned the clear plastic (dremmel) to the right size to fit inside the fairing. I used shard’s off the broken stand to make up and araldite mounting points and even recycled the trim to tidy up the edges. It fits fine and roadtesting showed it would stay jammed in place – success.

Speedo sensor on front calipher

Speedo sensor on front calipher

The speedo sensor is like a heavy duty job off a bicycle – the mounting bracket made use of the calipher bolt leaving a little work to locate the magnets. I cut off some threaded bar and then araldited this into the floating brake bobbins then araldited the little magnets on top of this ‘spacer’. Again a success.

Speedo magnet glued into disc bobbin

Speedo magnet glued into disc bobbin

What has proved less successful is getting the idiot lights to work. The neutral didn’t work anyway which I guess is to do with the sender in the Laverda gearbox so I’m not losing sleep over this. The high beam light works (hurrah) but I couldn’t get both indicator idiot lights to do their job. Fiddled with this long enough to run out of time and have to put it all back together to get to work on Monday. I will work on this during the week – I may just remove the indicators as the rear offside doesn’t work aside from the idiot light. I will cover the dash in some black plastic to finish it off and then finally decide where to take the ‘live’ feed and then set the wheel circumference and all should be well…

Aside from the dash I have to also get the front brake light and horn to work and replace the tyres then she is good to go…I think.

Nick 🙂

2nd August

Primed and almost ready to go

Primed and almost ready to go

Carried on with the frames this week – got my youngest child to spray them with primer while I was at work. No preparation just paint from a ‘rattle can’ straight onto shot blasted metal. I thought about preping the frame but then decided the rough surface would act as a good key. Seems I was right.

Inspection of both frames shows some rust damage. I’m going to cover this up with a light filler where necessary. I’m not going to fill parts on the rear of the frame and I’m thinking that maybe in sections that are hidden I’m going to add hammerite to try and stop any repeat in those ‘hard to get to areas’.

I started to rush at other parts to try and assemble a box full of parts to be blasted for more painting. I filled the box with brackets from the instruments, headlamp, stands, radiator and battery and top and bottom yoke. There is surprisingly little to paint. However I also started to prepare the wheels but gave up when I caught myself with a big hammer attempting to drift out bearings…walk away and do it when you get back from holiday. Less haste more speed as they say.

Something I did discover was that the rear wheel is missing one of the bearing washer. The dividing tube was a loose fit but of course that loose fit allows the bearings to be compressed when everything is tightened up. I don’t remember losing a bearing washer but then again I was working hard to keep the RGA running for the daily grind. In a way I’m a bit disappointed with myself for missing this back in the day.

Nick 🙂